QuickChecker - Spot Color Matching
One of the most useful functions of the QuickChecker is comparing to the sample from Scratchpad. It's a great way to start using this functionality and matching a known color. For production automation, you will want to build your Color Library and set up Projects for production use.
Note: Below are several Video Tutorials that will help with more advanced functionality, such as creation of Lookup Tables (Luts) and creation of a custom Swatch Book
Steps to compare
- Measure one or more samples - just by triggering the "Measure" button (in the Application or hardware button if exist)
- In the Compare Window select "Compare to Scratchpad", then select any of the existing measurements to be a Reference.
DONE! - The report will be displayed automatically, adopting changes of Reference or Color Specification
Options
- If you need Optimal Ink Density, before you start, measure the Substrate in advance.
That will provide a "Minus Paper" Density/∆E Error simulation (Ink GPS) - If you want to create a more representative Reference, use the "Start Variation" function to average a series of measurements with advanced statistical analysis. This is very important if the specimen is not perfectly homogenous, which happens in most print scenarios.
Example:
1. Measure substrate
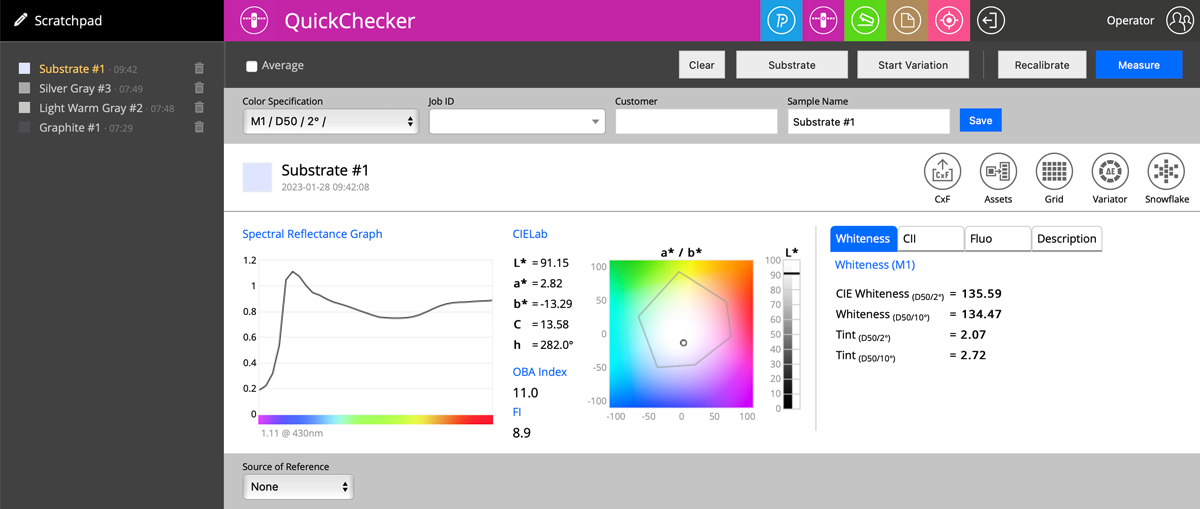
Please note that we have here a paper that contains a lot of OBAs - OBA Index = 11.0 ( Fluorescence Index = 8,9).
For the Substrate, we have tabs adapted to that kind of measurement! A Whiteness Tab is one that is available only for Substrates and reports a couple of paper-specific metrics.
2. Measure the first Sample.
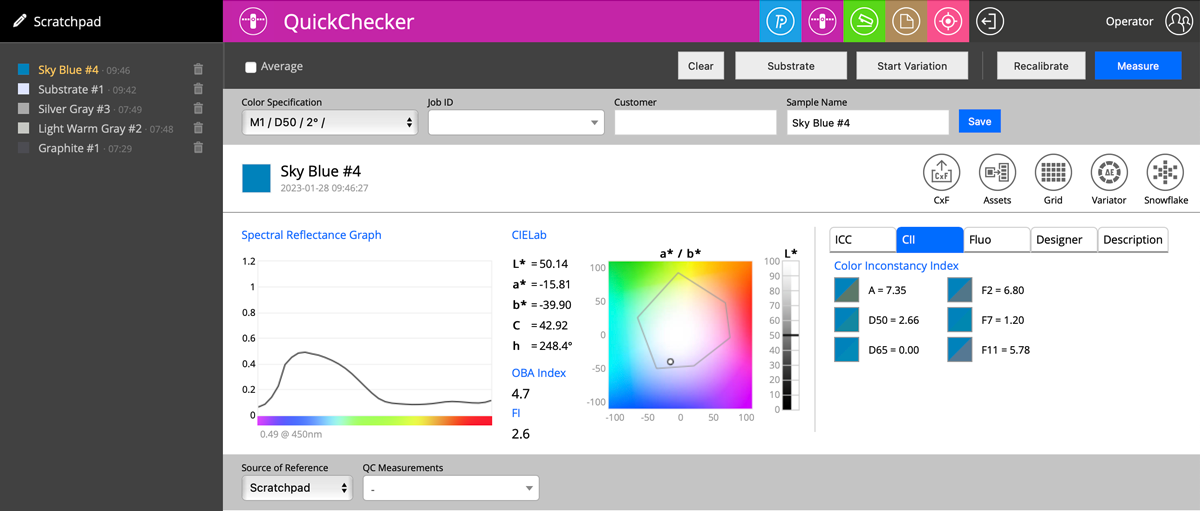
On this screenshot, we see Color Inconstancy Idexes (Reference Illuminant D65 can be changed in Global Preferences)
Switching tabs brings more types of Measurement Reports:
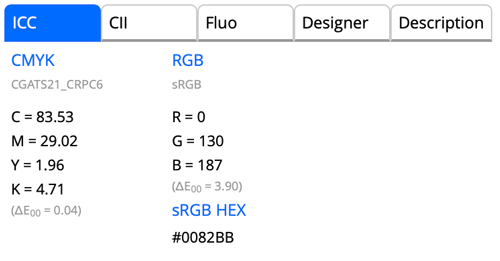 |
Lab coordinates compared to the closest CMYK/nCLR and RGB |
|
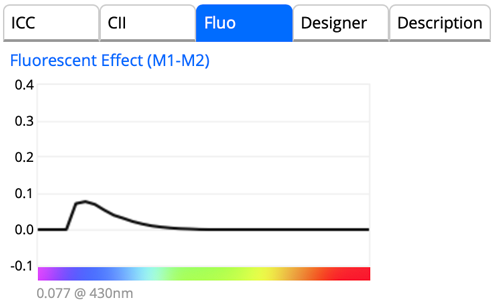 |
Fluorescencent Effect Compares M1 and M2 data to see how UV component of the light changes spectral readings |
|
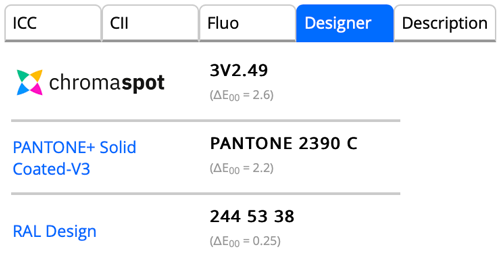 |
Search for the closest sample in:
Report ∆E error |
|
 |
The description that the Operator may create as an option. |
3. Next measurement - referred to the first Sample.
In this case, the Source of the Reference points to the first sample measured a minute ago.
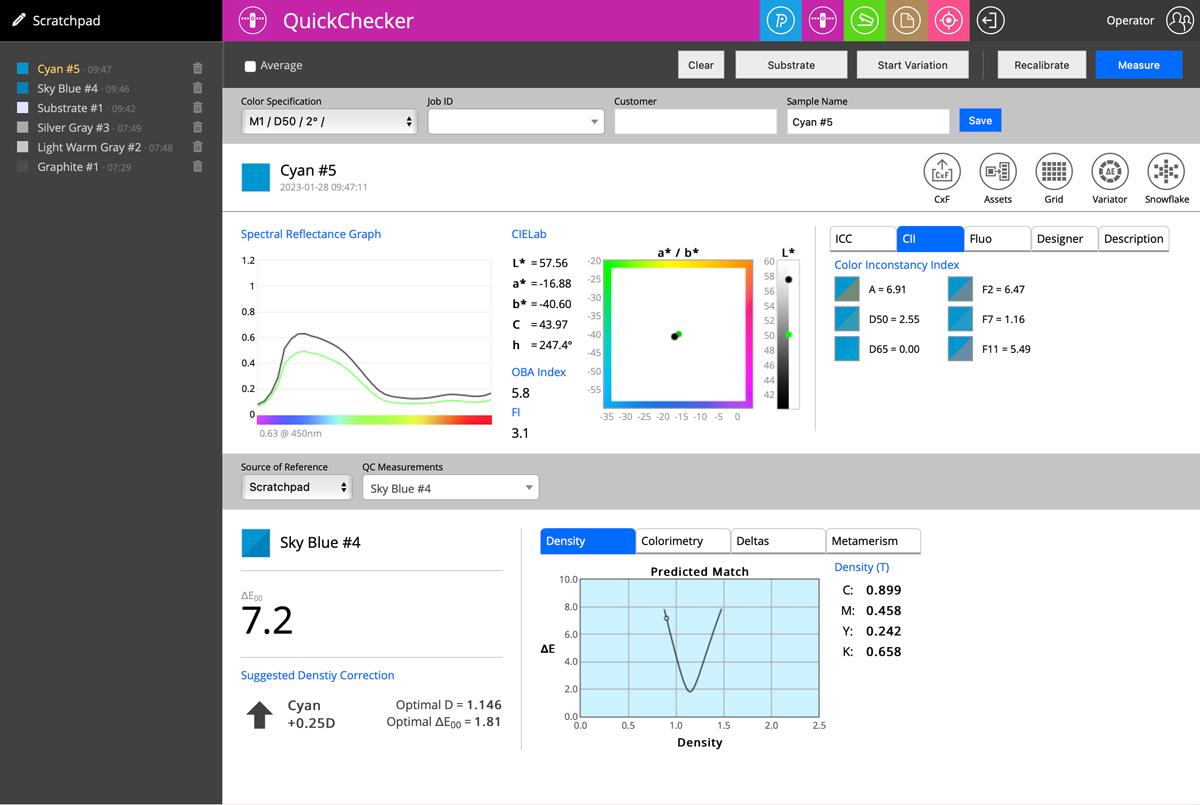
Density Tab - is showing prediction on how changing density (amount of ink) can reduce error - Optimal values are created by this simulation.
Additional tabs/reports:
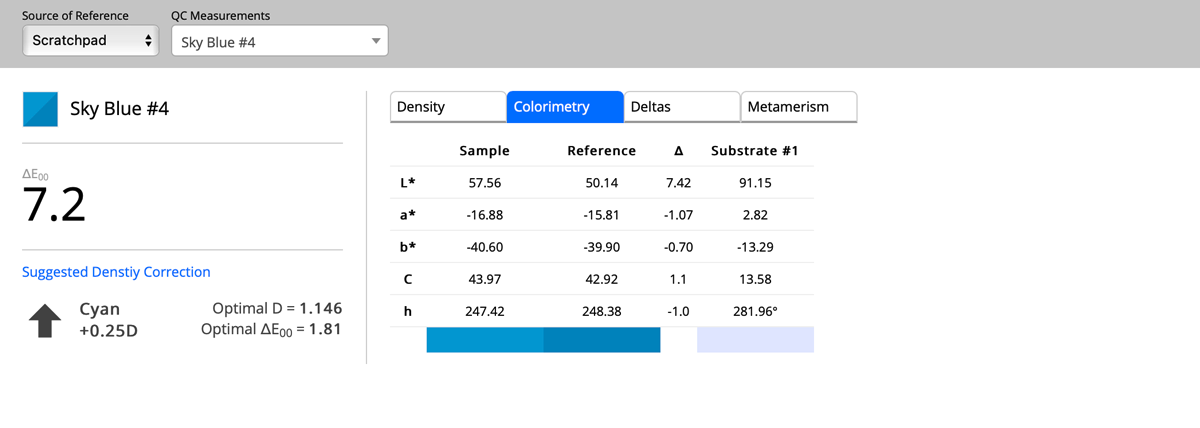
Colorimetry
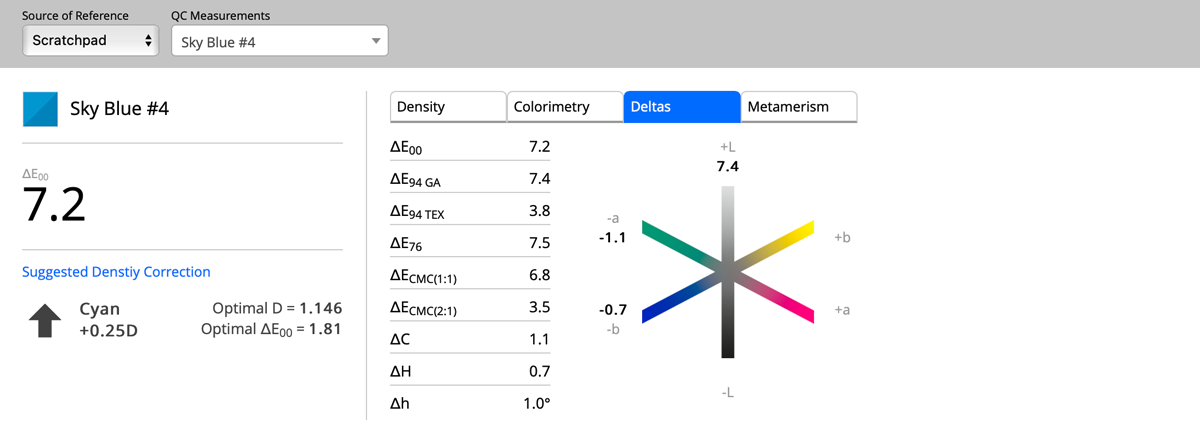
Deltas
and Metamerism
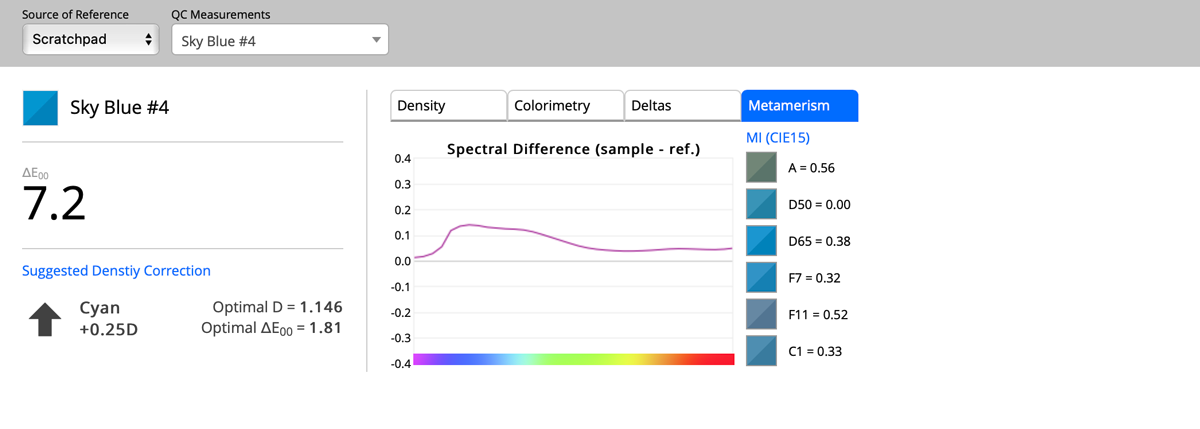
Please note
Most of the Instruments can measure all M-conditions at once - for all instruments, it is possible to create custom Color Specifications - for example, replace typical D50 with Custom Lighting. Once the measurement is performed, the Operator can select different Color Specification, and all parameters will be instantly recalculated.
No other application on the market offers that can of sample evaluation. It takes seconds to make it.
Video
-
How to save a PDF file for use in the Named Color workflow with ChromaChecker. ChromaChecker is able to create custom lookup tables using device ICC output profiles. These tables are used to convert LAB values for each individual press to achieve the best match for critical spot color workflows.
-
The Spot Color Exercise is an interactive way to communicate how Spot Colors will print and determine the Delta E difference that is acceptable. The exercise is an instruction and a practical tool for designers, print buyers, and sales for communicating color.
-
This tutorial shows how Chromachecker Capture scans control strips that include spot colors as part of your overall color quality control program.
-
ChromaChecker allows you to track the reproduction of critical corporate colors using tools that allow you to define a color library for defining and sharing color definitions. This allows you to define the master color and track the color from design through production and check the reproduction along the way using LAB values, ISO ISO17972, and production Look Up Tables (LUTs)
-
Second Tuesday Seminar - March 12, 2024
-
Second Tuesday Seminar - May 14, 2024 — We have Certified ChromaChecker consultants who can come to your site or provide remote consulting services to help you integrate spot color matching in your workflow.
-
Second Tuesday Seminar - July 9, 2024
-
2nd Tuesday February 11, 2024
-
2nd Tuesday Webinar, March 11, 2025
Contact ChromaChecker Support
Additional information and Support Form is available for logged users.